Gophr has now integrated with Zapiet’s app, Zapiet – Pickup + Delivery, which means customers can generate quotes at checkout, create delivery jobs, receive status updates and cancel jobs, all from within their Shopify store.
Table of Contents
Here’s how to download the app and access Gophr’s same day delivery, plus automate some great features…
Installing the Zapiet – Pickup + Delivery App
If you’re already using the Zapiet – Pickup + Delivery app then you can skip this section.
If not, the first step is to make sure you have the Zapiet – Pickup + Delivery app installed in your Shopify store. Download it here.
Installing Zapiet on the Shopify App Store
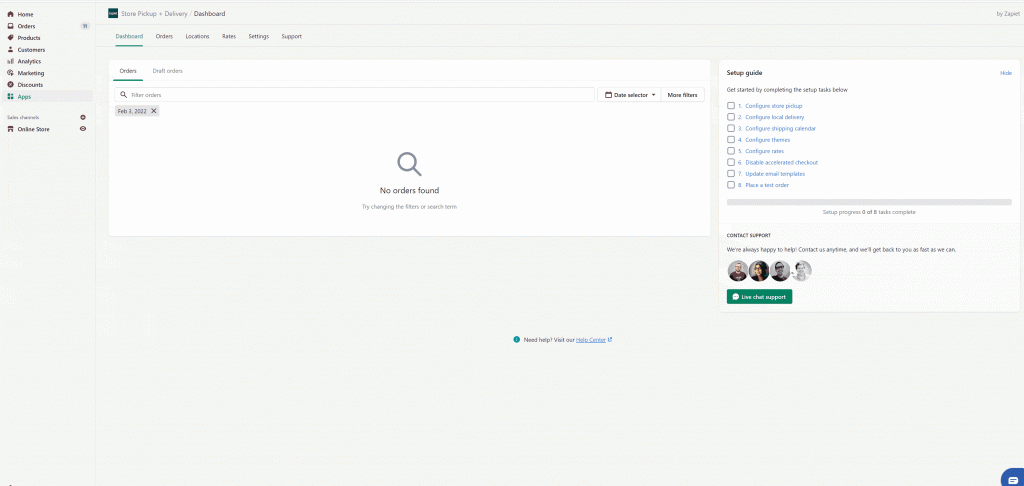
Navigate to the Apps icon in the left menu. You’ll then see a list of the apps installed on your Shopify store. Click the Pickup + Delivery app.
Once you’ve clicked on the app you should see a section called ‘Setup guide’ on the right of the screen.
Each of the items link to a step that must be completed in order to use the Pickup + Delivery app to handle your shop deliveries.
Configuring Zapiet app
Creating a Gophr Account and getting your API Key
- If you don’t already have a Gophr account, go to the Gophr Customer Portal and create one – it takes less than a minute [more information about us here.]
- Once you’ve created an account, click on the messenger icon in the bottom right of the screen. Send us a message saying that you’d like to start using our Zapiet integration and want to request an API key. One of our team will respond straight away to help you get set up.
Adding Gophr as a last-mile delivery provider
Once you have your Gophr customer account and API key, you’re ready to activate Gophr as a last mile provider from within the Pickup + Delivery app.
- Head to Shopify store admin, access the Zapiet dashboard by clicking on Apps > Pickup + Delivery.
- From the Pickup + Delivery dashboard, select the Settings tab and then select the last mile delivery option under the Advanced heading.
- From the list of last mile delivery providers, find Gophr and click the Activate Gophr button.
- You’ll now be prompted to enter your API key. This is the key that was given to you by our customer service team. Once you’ve entered and confirmed this you will be presented with the Gophr integration settings page. Please ensure that you paste your API key AGAIN into the box provided.
Creating Packaging Rules
The next step is to add weight-based rules for packages you want to send. By setting these rules, Gophr is able to automatically detect the vehicle type needed to successfully deliver your parcel.
Gophr quotes will not appear to your customers at checkout if the package falls outside of these rules.
Configuring the Gophr Integration
Gophr allows you to configure various other options from the settings page within the app. Available options include:
- Enabling which shop locations Gophr rates will show for.
- Offering free delivery over a set order value.
If you have more specific requirements (e.g. set pricing within a given radius of the shop, specific vehicles required etc.) then please contact us via the chat on our customer portal and we’ll be happy to set this up for you.
Retrieving Quotes
Now that you have Gophr enabled as a last-mile provider, quotes for qualifying jobs will automatically be shown to your customers at checkout as an available shipping method.
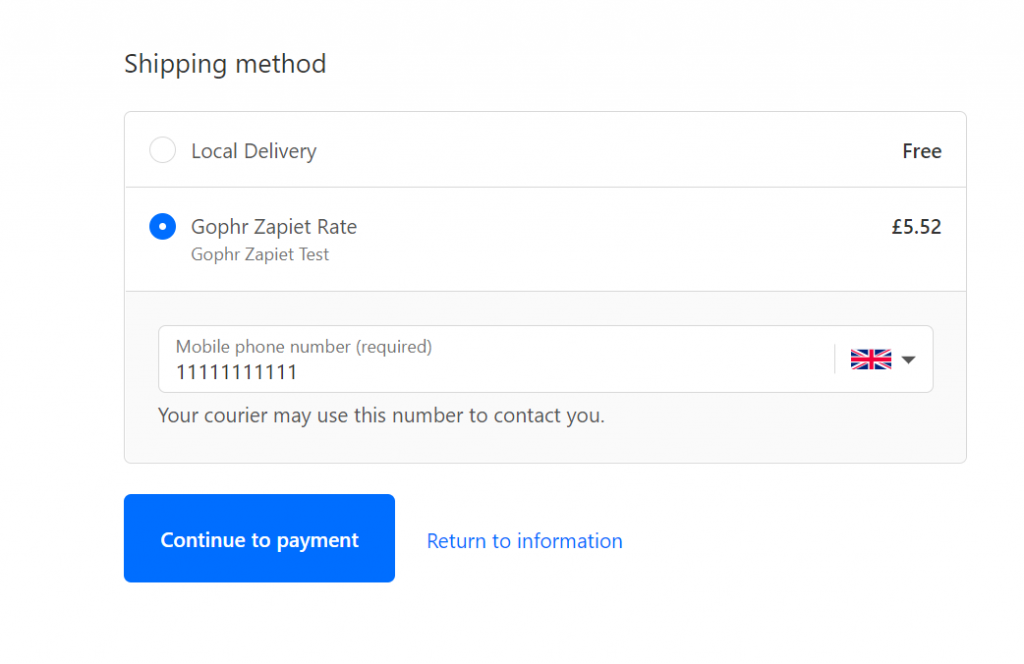
Once a quote is generated, the customer can checkout and the job will automatically be placed with Gophr.
Tracking
Once a job has been booked, Zapiet will show you a link to the Gophr live tracking screen in the order view of the admin.
And if you want to check job status updates (e.g. picked up, delivered and cancelled), these will appear in the Timeline section of the order view.
Cancelling Jobs
You can cancel a job through the Shopify admin screen. Please note: cancellations are only possible BEFORE the job has been allocated to a delivery driver. You can check if the job has been allocated through our customer portal. If you need to cancel a job after it has been allocated then please contact our customer support team via the chat icon.